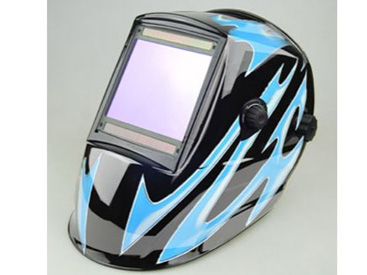
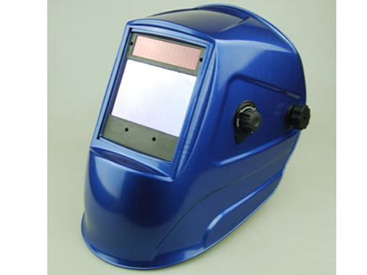
There are two main types of lens styles on welding helmets: passive lenses and auto-darkening lenses. Passive lens helmets are the traditional welding helmets. In fact, for those who haven't done much welding, this may be the only helmet that comes to mind. These hoods have a lens that filters out ultraviolet and infrared light with a permanently tinted fixed shadow.
Because the lens is too dark to see through when the welding arc is not lit, the wearer will flip the helmet's panel up when putting the welder in position, then flip it down before triggering the arc. Helmets with auto-darkening lenses do not need to change the position of the panel. When the lens is inactive (usually #3 or #4), the lens will provide a low level of shading. Once you hit the arc, the sensor will detect the light and darken the lens.
1. Choose The Right Lens Reaction Time
As long as you have an auto-darkening welding helmet that meets ANSI Z87.1 and CSA Z94.3 standards, your eyes should be protected from damage. Even when the lens isn't darkened, it still has built-in protection against infrared and ultraviolet light--and it's these things that can damage your eyes. However, the time it takes for the lens to darken can affect your comfort. Any quality helmet will dim within milliseconds before your eyes have time to register the light from the arc.

Welding Helmet
If you're doing only light welding, you might be fine with a less expensive helmet that has a lens reaction time rated at 1/3,600 of a second. But if you're spending the better part of a day on a welding project, a lens rated at that speed may still cause eye strain and fatigue. In cases like these, it's a better idea to choose a helmet with a faster reaction time. A helmet with a reaction speed rating of 1/20,000 of a second will keep your eyes more comfortable, even during long days of working.
2. Choose Between Fixed Shade & Variable Shade Lenses
Some welding helmets with auto-darkening lenses automatically darken the lens to a #10 shade, which is a common shade for lenses with passive helmets. If you're mainly sticking to one type of welding, or if you keep the amperage consistent, this kind of helmet might be sufficient. But if you switch between MIG and TIG, for example, you may want to choose a variable shade helmet instead of a fixed shade one. These helmets have a range of shades, usually between #9 and #13. This allows you to still see what you're doing, even when the brightness of the welding arc changes.
3. Check Out Adjustable Delay & Sensitivity Controls
While entry-level auto-dimming helmets may lack sensitivity and delay controls, these can be valuable tools. Adjustable sensitivity controls can allow you to choose what level of brightness the lens must detect before it darkens. If there are other welders nearby and you don't have adjustable sensitivity controls, their arcs might trigger your helmet's responses. In addition, if you're TIG welding, the lower amperages might not trigger a helmet with its sensitivity controls set too high.

Auto-Darkening Welding Helmet
Being able to adjust the delay is also useful. These controls allow you to adjust how long the lens remains dark after the arc stops. A shorter delay time can be useful when you're tack welding since you can reposition the welder faster. For higher-amperage welding, a longer delay of up to a second may be preferable for allowing the puddle to cool.
4. Choose Your Viewing Size & Number Of Sensors
Welding hoods are available with a variety of viewing area sizes. Ultimately, the size that you choose really comes down to which one you like best. However, larger viewing area sizes do have some benefits. With improved peripheral vision, you can get a better idea of where you are when you're working on larger weld assemblies. It also makes welding out of position easier.
Some inexpensive auto-darkening helmets are equipped with just one or two sensors. However, a helmet with four sensors is ideal. More sensors mean more coverage. If there's a flash when you weld out of position, a two-sensor helmet may fail to register it and not darken. However, a four-sensor helmet is likely to catch any flash and darken the lens accordingly.
You can find high-quality auto-darkening helmets, click here.

5. Consider Power Source And Control Panel Positioning
Without a power source, your helmet won't do you much good. Usually, a helmet will use batteries, solar panels, or both. Using both is the best way to go since solar panels can help prolong the life of the battery.
Another thing to take into consideration is the location of the controls. An external control panel allows you to change settings without removing the helmet, which can be handy. However, their positioning on the exterior means that they may suffer damage more easily. Internal controls are more protected but less convenient to adjust.
Consulting an expert is the best way to make sure you have the best type of welding helmet. Contact us at Hebei Machinery for expert advice on all things welding helmets.


